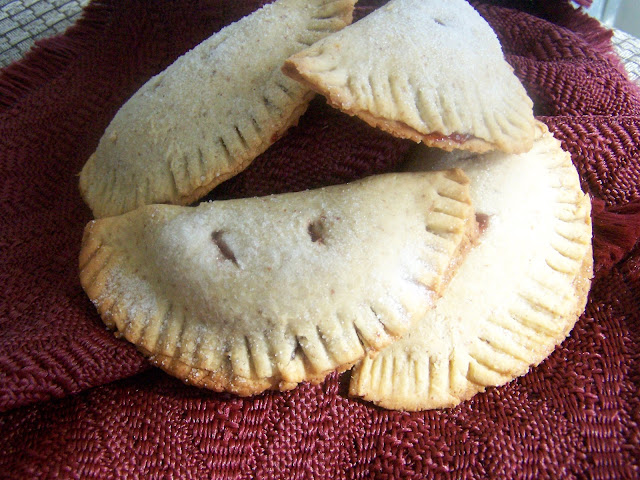
Aren't they pretty? Lower in calories than most turnovers and they are sugar free!
This dough would be great for savory pies too. Just remove the sweetener and add cheese or spices.
It's a beautiful pliable dough. I am tickled pink!
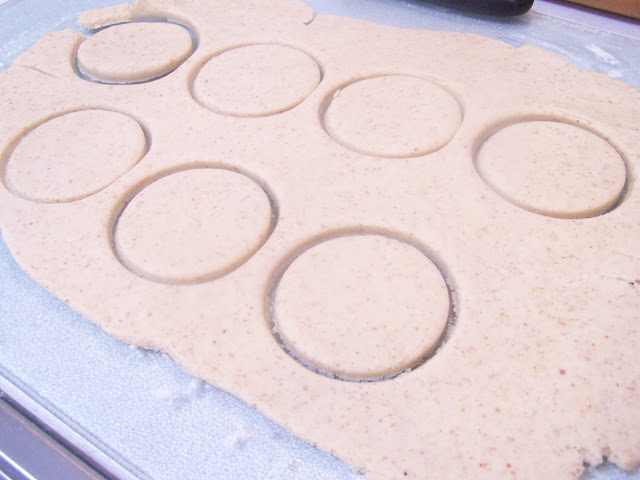
You will need to roll out your circles a little more after cutting.
1/7/13 follow up note. This dough has been in my fridge for weeks and it's still good! The recipe makes a lot, but it's great having the dough on hand to make Hubby a pie in just minutes. I've found I like rolling out larger circles and making the pies bigger. My family loves them and you can get more filling into a larger pie. Have you tried them yet? What's your favorite filling?
Skinny Gluten Free Fruit Turnovers
Ingredients:
For the Crust
Instructions: - 4 cups gluten free flour mix *see my favorite recipe in note below
- 1 1/2 cups finely ground almond meal/not flour
- 1 teaspoon salt
- 2 teaspoons xanthan gum, (if your mix includes xanthan you don't need to add this or try 1 tablespoon ground psyllium husks instead of xanthan)
- 1 stick cold, unsalted butter, cut into tablespoon-size pieces
- 6 teaspoons instant yeast
- 1 tablespoon granulated cane sugar
- 1/2 cup warm water
- 4 egg yolks, room temp
- 3/4 cup milk, warmed
- 1/4 cup Stevia baking blend or 1/8th teaspoon pure white NuNaturals Stevia powder
- 12 ounces frozen fruit or 3 apples, peeled, cored, and cut into 1/2-inch cubes
- 1/2 cup cane or palm sugar or 1/8th teaspoon NuNaturals Stevia powder, to taste
- 1/2 lemon, juiced
- 1/4 cup water or juice
- 1 teaspoon ground cinnamon-opt
- 2 tablespoons white rice flour
- For sealing and Topping
- 1 large egg, beaten
- 2 tablespoons granulated cane sugar or sugar free alternative
- Start by sifting or mixing well the first 5 dry ingredients into a large bowl, to create the flour blend. Then, separate 1/3 cup of the flour blend into a medium sized bowl and set aside.
- Next, combine the warm water, sugar and yeast in a small bowl. Let it sit for a few minutes until it becomes foamy.
- In a third large bowl, whisk the 4 egg yolks, milk, sugars and vanilla.
- Add the flour and stir in the yeast mixture until it comes together in a nice firm dough. Cover and refrigerate for an hour.
- Cut the cold butter into small cubes. With your hands, combine the butter with the reserved 1/3 cup of flour until a thick buttery/flour mixture forms. Shape into a flattened square, then refrigerate this for 20 minutes.
- Once you've refrigerated the yeasty dough for an hour, and the butter/flour mixture has chilled in the fridge for 20 minutes, you can take them both out and place them on a large work counter/board.
- First work with the yeast dough. Shape this dough into a ball. Sprinkle rice flour over the surface of the ball of dough you've just created. Sprinkle a bit of rice flour on the counter or parchment paper. Flatten it out with your hands,and roll it into a rectangular shape, with a floured rolling pin. It should be about 1/2 an inch thick.
- Next, place the rectangular butter/flour block in the center of the yeast dough. Fold the top part of the yeast dough over the the butter block. Repeat with the bottom part, then fold the left and right sides over the butter block. You want to enclose the butter block in the yeast dough.
- Sprinkle with a little more rice flour or place parchment paper over the dough. Roll up from the center. Then down toward you, from the center. Then left from the center and right from the center. This completes one round of rolling.
- Fold the dough over itself again (like you did when covering the butter block), sprinkle with a bit of rice flour, if necessary, and roll out the dough the same way again.
- Refrigerate the dough for 1 hour. Then remove the dough and roll it out two more times, the same way as before, folding and rolling. Refrigerate for one more hour.
- Ok, one more time, roll twice again. This is not hard to do and takes only a few minutes each time.
- After you've rolled out the dough a total of 3 times, with 2-1 hour chilling sessions in the fridge you are done. Now wrap the dough and leave in the fridge over night
- Make your filling and refrigerate
Preheat your oven to 350 degrees. Spray a large baking sheet with cooking oil
- Take out your dough and cut in 1/2. Roll out on your lightly floured board or parchment paper.
- Cut out pies with a 4 inch glass and gather up the scraps. Put excess dough back in the fridge
- Roll out each circle again a little and place on baking sheet
- Brush a little egg on each circle
- Add a small teaspoon of filling in the center of each circle. Make sure you have plenty of room on the outside for the edges to seal. I rolled the second batch thinner and had more edge to crimp so my filling wouldn't leak out.
- Fold in half over the filling and crimp edges with a fork firmly
- Make 2 small slits in the top and brush with a little more egg. Sprinkle with sugar
- Bake for 15-20 minutes or until bottoms are brown and the filling starts to bubble. Enjoy!!!!
1 1/4 C (170 g) gluten free brown rice flour
1 1/4 C (205 g) gluten free white rice flour
1 C (120 g) tapioca flour
1 C (165 g) gluten free sweet rice flour


Comments
Post a Comment
Hi! Thanks for stopping by!
Thank you so much for your comments and questions. I respond as fast as I can, so please be sure to check back for your answer. By leaving a comment you are consenting to your email being collected for communication purposes only. Blessings, Ali